Learning Flutter - Implicit Animations
In this short tutorial, I will attempt to cover AnimatedPositioned and SlideTransition from the popular Flutter UI Mobile framework.
See the Pen Dark Mode Toggle Switch by Rong Ying (@kohrongying) on CodePen.
What is Flutter
Developed by Google, Flutter is a UI framework for building native mobile, web and desktop apps, based on Dart language.
I recently started learning Flutter, through a Udacity course and then by grew interested as Codepen began to provide a flutter IDE that was built on top of Dartpad. So today, I wish to go through how I created this Dark Mode Toggle in Flutter, so show you guys how to develop in Flutter and the endless possibilities this brings us!
0. Set up
- Ensure you have Flutter installed, with web support. I will be running flutter in Chrome device instead of an emulator
- Install an IDE - I used Android Studio and installed the Flutter and Dart plugins
- Start with the scaffolding
// main.dart
import 'package:flutter/material.dart';
void main() => runApp(MyApp());
class MyApp extends StatelessWidget {
Widget build(BuildContext context) {
return MaterialApp(
theme: ThemeData(
brightness: Brightness.dark,
),
home: Scaffold(body: Center(child: SwitchWidget())),
debugShowCheckedModeBanner: false,
);
}
}In Flutter, there are two types of widgets (Stateless or Stateful). Judging from the name, you can guess that Stateful widgets hold state (eg some form of mutable variables - you can think of as React state if you're a React JS developer).
The main() function is the entry point.
Every widget must have an overriden build function that takes a build context, necessary to render the screen.
1. Add our custom stateful Switch Widget
TIP: If you're using Android Studio, you can type stful and it'll generate the scaffolding for a stateful widget.
class SwitchWidget extends StatefulWidget {
const SwitchWidget({
Key key,
}) : super(key: key);
_SwitchWidgetState createState() => _SwitchWidgetState();
}
class _SwitchWidgetState extends State<SwitchWidget> {
bool _lightMode = true; // our state
Widget build(BuildContext context) {
return Container(
width: 300.0,
height: 300.0,
color: Colors.black,
child: Stack(children: [
Text('hello'),
// TODO(1) - Add the Switch Widget from flutter here
])
);
}
}For our base container, we specify a width and height (this is our square) and we set the background to be black. The container will contain a Stack. Usually if there are multiple items to render, I like to use a Column or Row widget or even a ListView (if you need it to scroll). Stack is a very handy widget in which you imagine it is a hamburger or sandwich and the children widgets are the ingredients to the hamburger (bread, cheese, ham, lettuce). You can choose the order and where you want to place the widgets. They can overlap.
Let's run the app. In your terminal, type:
$ flutter run -d chrome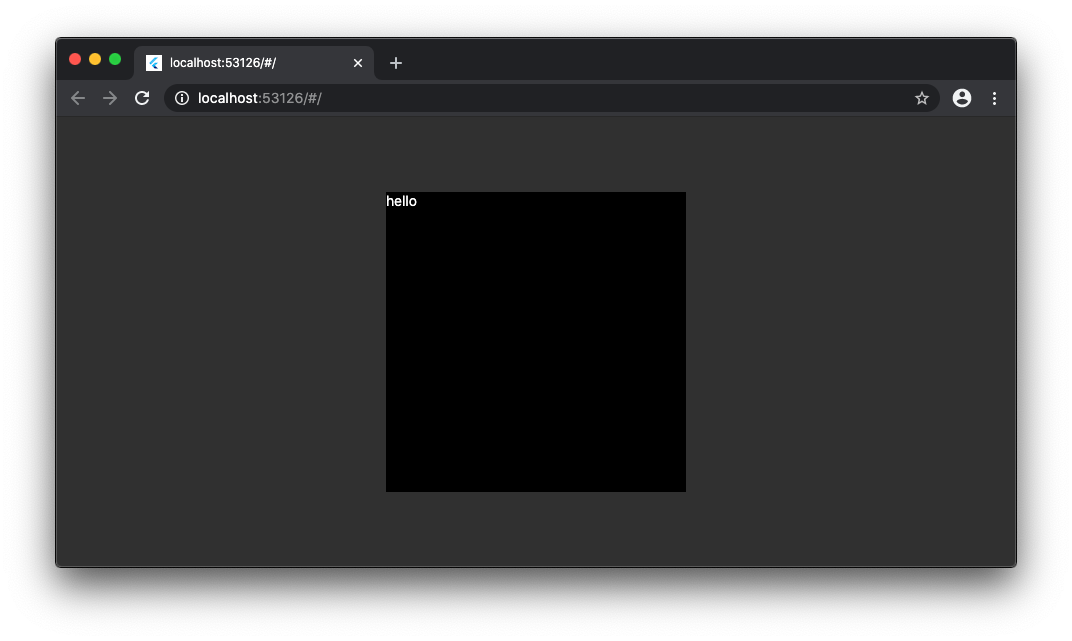 You should see the scaffolding set up we just did.
2. Add the Flutter Switch Widget
Under TODO(1), insert this code.
Align(
alignment: Alignment.bottomCenter,
child: Switch(
value: _lightMode,
onChanged: (newVal) {
setState(() {
_lightMode = newVal;
});
},
),
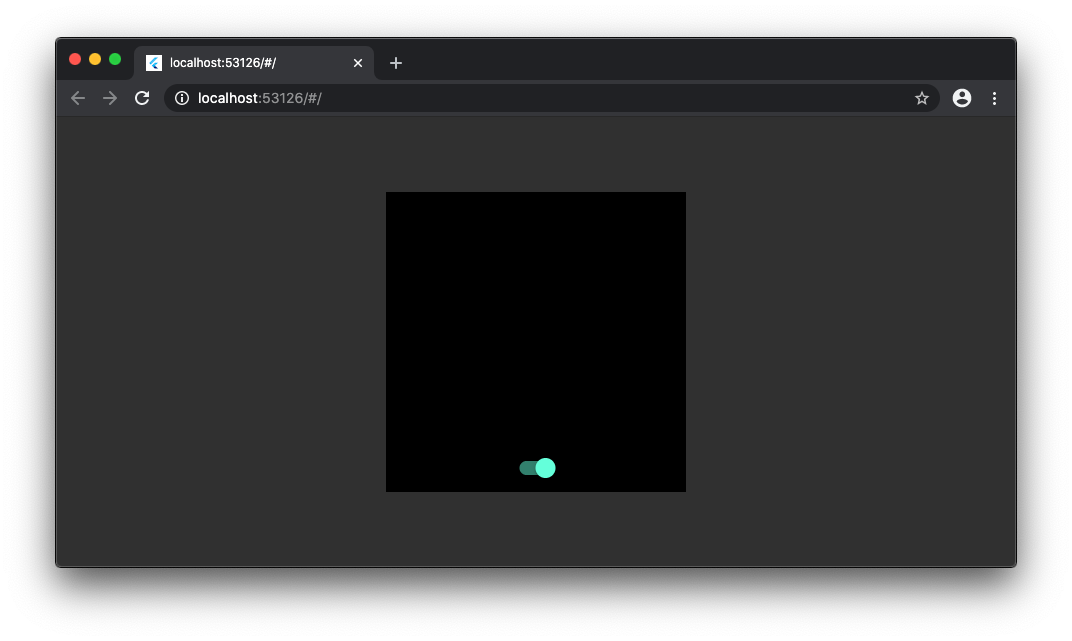
),The actual widget is Switch, which I wrapped in an Align widget. I find the Align widget very useful as not only can you center widgets easily, you can move them to centerLeft or centerRight which is very readable.
Coming from a React background, I found the Flutter syntax pretty similar. We update the state variable in the onChanged method using a setState method.
Now if you refresh the app in your terminal (type r for hot reload), you should be able to see a Material themed switch and be able to interact with it.
3. Add the two icons, wrapped with AnimatedPositioned
Now let's add the two icons as part of the Stack's children.
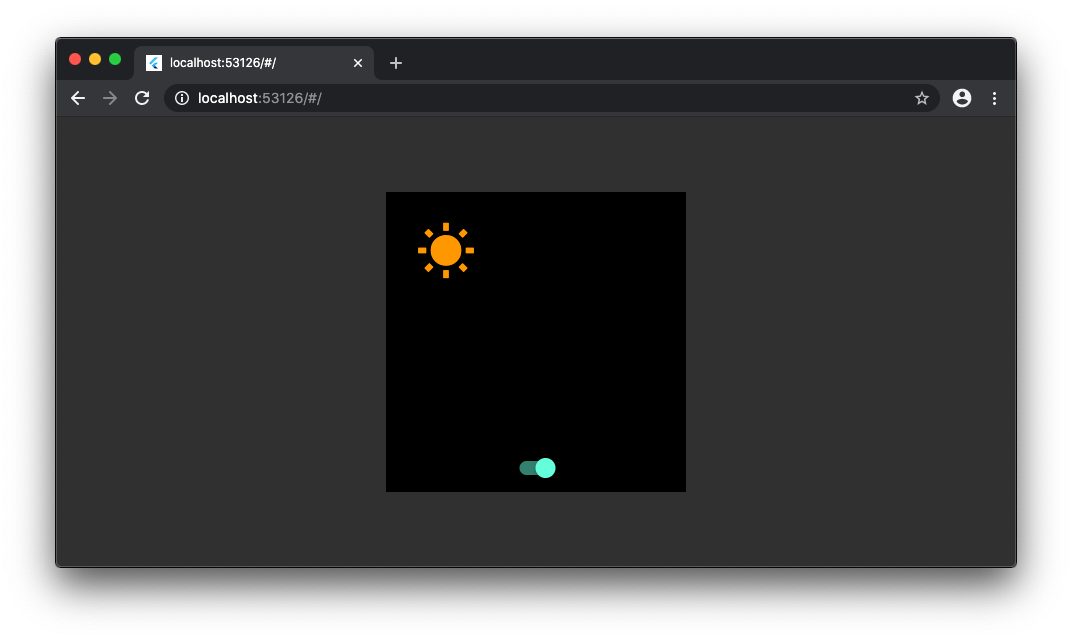
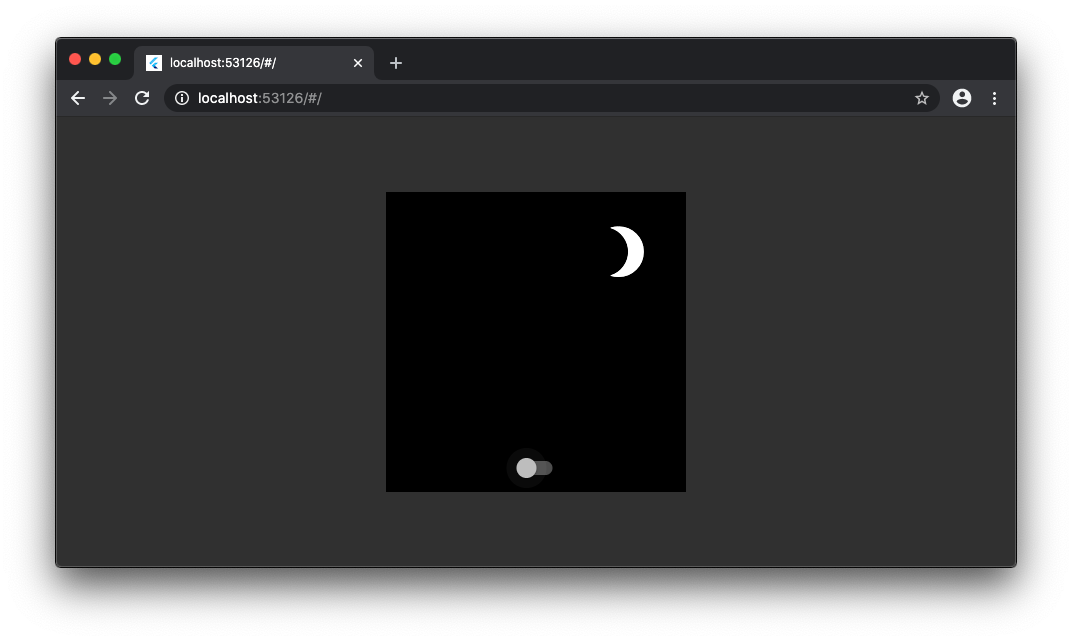
AnimatedPositioned(
  duration: Duration(milliseconds: 200),
  top: 30,
  right: _lightMode ? -80 : 30,
  child: Icon(
    Icons.brightness_3,
    size: 60.0,
  )
),
AnimatedPositioned(
  duration: Duration(milliseconds: 200),
  top: 30,
  left: _lightMode ? 30 : -90,
  child: Icon(
    Icons.wb_sunny,
    size: 60.0,
    color: Colors.orange,
  )
),
Here's I am making use of Flutter's implicit animation like AnimatedPositioned to animate the movement from right to left.
Reload your app and click on the switch. As the _lightMode variable changes from true to false, the right and left properties of the AnimatedPositioned widget changes, and the implicit animation will be responsible for moving the moon icon from -80 to 30 from the right, and moving the sun icon from 30 to -80 from the left. The negative number is my hack to hide it from the widget.
4. Add a SlideTransition
Now we add a slide transition to change the background from white (light mode) to black (dark mode). For this, I used a SlideTransition to slide a white container to the left to hide it, and make the background color of black visible.
Add the SlideTransition as the first child of the Stack as we want this to be the bottomest layer. Otherwise, it will obstruct the icons and switch. Don't believe me, you try :p
SlideTransition(
  position: _offsetAnimation,
  child: Container(
      height: 300.0,
      width: 300.0,
      color: Colors.white
  )
),
We have to define an _offsetAnimation now. In order to control the animation, we need an Animation and an AnimationController as well. At the beginning of the State class, insert this code:
bool _lightMode = true;
AnimationController _controller;
Animation<Offset> _offsetAnimation;
void initState() {
super.initState();
_controller = AnimationController(
duration: const Duration(milliseconds: 500),
vsync: this,
);
_offsetAnimation = Tween<Offset>(
begin: Offset.zero,
end: const Offset(-1, 0.0), // off screen
).animate(CurvedAnimation(
parent: _controller,
curve: Curves.easeInOutCirc,
));
}The actual work done is at the Offset. We are animating a white container to move to an offset of -1 in the x direction, which is a translation to the left. And the duration is coontrolled by the controller which we define in the initState() method of the class.
In order to create one AnimationController in a state, we have to add SingleTickerProviderStateMixcin to the State widget.
Our class looks like this now:
class _SwitchWidgetState extends State<SwitchWidget> with SingleTickerProviderStateMixin {
  //
}
One final thing we need to do is to trigger the animation via the controller. We do this in the onChanged() method of the Switch.
onChanged: (newVal) {
  setState(() {
    _lightMode = newVal;
  });
  if (_lightMode) {
    _controller.reverse(); // move white container right
  } else {
    _controller.forward(); // move white container left
  }
},
The forward() and reverse() method will move the white container left and right, respectively. To be clear, the default position of the white container is in the visible frame. Hence the first time the controller is triggered is when we turn dark mode on, and controller.forward() is run.
And that's it!
We learnt to use AnimatedPositioned and SlideTransition in a flutter widget.
Tada! You can view the full code in my github, or on Codepen.
This pen was part of my Flutter #dailyui project.
Did you know this was built with 11ty and tailwind? And works even with Javascript disabled? Yeah I don't care either.